Introduction
There’s something undeniably captivating about crocheted cables—the way they twist and climb like braided ropes, adding texture, depth, and old-world charm to sweaters, cowls, and blankets. For years, many crocheters assumed cables were the exclusive domain of knitters—until designers proved otherwise.
Yes, you can crochet stunning, three-dimensional cables without a knitting needle in sight. And while the technique may look complex at first glance, it’s built on familiar stitches and just a few clever tricks. The secret lies not in magic, but in strategy: front-post stitches, careful stitch placement, and a little patience.
In this guide, we’ll demystify advanced cable crochet so you can create professional-looking textures with confidence. You’ll learn how cables actually work, master the foundational front-post double crochet (FPdc), tackle classic cable crosses, avoid common pitfalls, and even design your own cable patterns. Whether you’re ready to upgrade a cozy winter sweater or impress your craft circle, these techniques will take your crochet game to the next level.
Grab your hook, some worsted-weight yarn, and let’s twist things up—literally.
Understanding How Crochet Cables Work (It’s All About Illusion)
Unlike knitting—where cables are made by physically rearranging stitches on needles—crochet cables rely on visual tricks using post stitches.
In crochet, most stitches are worked into the top loops of the previous row. But post stitches (like front-post and back-post double crochet) are worked around the vertical post of a stitch from one or more rows below. When you work a front-post stitch, it pops forward, creating a raised ridge. Back-post stitches recede slightly, forming a subtle groove.
By alternating these stitches and strategically “crossing” them over adjacent columns, you create the illusion of twisted ropes—without ever moving stitches out of order.
Think of it like theater lighting: the same stage looks completely different under spotlights versus shadows. Post stitches “highlight” certain columns, making them appear to weave over and under their neighbors.
This technique is fully compatible with standard crochet patterns—you’re not breaking any rules, just bending perception. And the best part? Once you understand the structure, you can read (and even write) cable charts with ease.
So before you dive into your first cable panel, remember: you’re not creating real twists—you’re creating the appearance of them through smart stitch placement. That mindset shift makes all the difference.
Mastering the Foundation: Front-Post and Back-Post Stitches
Before tackling full cables, you must feel confident with front-post double crochet (FPdc) and back-post double crochet (BPdc)—the building blocks of all crocheted cables.
How to work FPdc:
- Yarn over.
- Insert your hook from front to back around the post of the designated stitch (not into the top).
- Complete the double crochet as usual.
How to work BPdc:
Same steps—but insert the hook from back to front around the post.
Pro tip: Use a smooth, light-colored worsted-weight yarn (like Lion Brand Basic Stitch or Red Heart Soft) and a hook one size smaller than usual. This creates tighter fabric, making posts stand out more clearly.
Practice exercise:
- Chain 20.
- Row 1: DC in 4th chain from hook and across.
- Row 2: Chain 3 (counts as first DC), then alternate FPdc and BPdc across.
- Repeat Row 2 five times.
You’ll see vertical ridges form instantly. This “ribbed” fabric is the canvas for cables. Spend time here—comfort with post stitches prevents frustration later.
Common mistake: Working into the top of the stitch instead of around the post. If your cable looks flat, double-check your hook placement. It’s a subtle motion, but the payoff is huge.
Once this feels natural, you’re ready to make those columns cross.
Creating Classic Cable Crosses: Step-by-Step
Now for the fun part: making stitches appear to cross over each other.
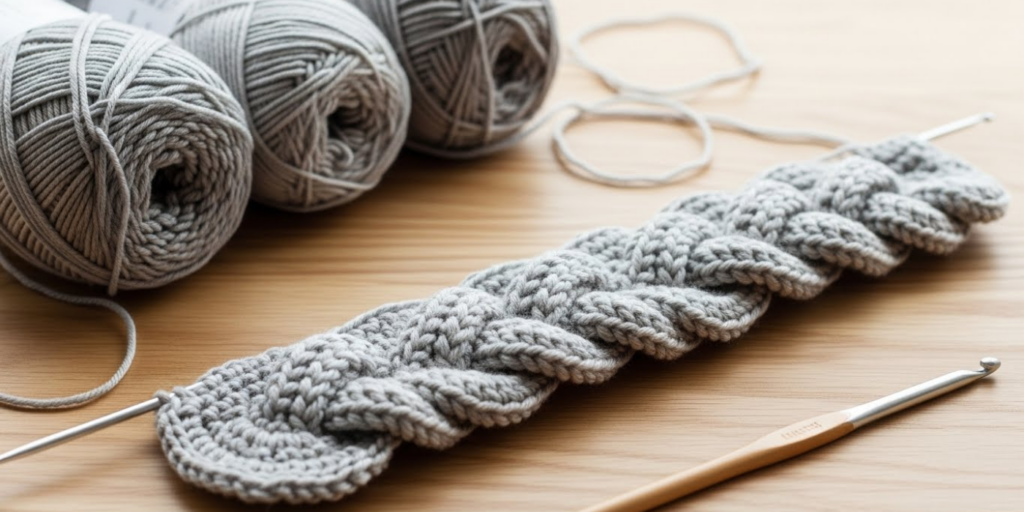
A basic 2-over-2 cable (the most common type) involves four vertical post-stitch columns. Every few rows, you’ll “skip” the first two stitches, work the next two, then go back and work the skipped ones—creating a visual cross.
Basic 4-Stitch Right-Leaning Cable (C4R)
Worked over 4 post-stitch columns every 4th row:
- Work to the cable section.
- Skip the next 2 post stitches (but don’t leave them unworked!).
- FPdc around the next 2 posts (these will appear to come forward).
- Now, go back and FPdc around the 2 skipped posts (these will appear to go behind).
For a left-leaning cable (C4L), reverse the order: work the back stitches first, then the front.
Real-world tip: Use stitch markers to label your cable columns. Place a different color on the first and third post so you never lose your place. Also, cables almost always appear on the right side of the work—so plan your row counts accordingly.
Pattern snippet example:
Row 1 (RS): Work in established rib pattern.
Row 2 (WS): Work in pattern.
Row 3 (RS): Continue rib… then C4R over next 4 posts… continue.
Many crocheters find it helpful to write out their cable rows on sticky notes or use a row counter. Cables demand focus—but the rhythm becomes second nature with practice.
Troubleshooting & Pro Tips for Flawless Cables

Even experienced crocheters run into cable challenges. Here’s how to solve them:
Problem: Cables look flat or indistinct
→ Solution: Use a hook 0.5–1.0 mm smaller than recommended for your yarn. Tighter tension makes post stitches pop. Choose a non-splitty yarn with good stitch definition (avoid mohair or fuzzy blends).
Problem: Fabric curls or buckles
→ Solution: Cables pull fabric inward. Always swatch a cable panel and measure gauge. You may need to add extra stitches on either side to compensate for the draw-in.
Problem: Losing track of cable rows
→ Solution: Use a cable needle or locking stitch marker to mark the right-side rows. Or highlight your pattern’s cable rows with a colored pen.
Bonus pro technique: Herringbone cables
Once you’ve mastered basic crosses, try offsetting cables every other row to create a zigzag or herringbone effect. This adds dynamic movement to scarves and blankets.
Design insight: Cables work best on vertical or gently curved surfaces (sweater fronts, cowls, pillow covers). Avoid placing them on highly shaped areas like sleeve caps—distortion ruins the effect.
Lastly, blocking is non-negotiable. After finishing, wet-block your piece and gently stretch the cable columns. This opens up the texture and locks the “twist” into place.
Designing Your Own Cable Patterns: Beyond the Basics
Ready to level up? Once you understand cable logic, you can start customizing.
Start simple:
- Change the frequency of crosses (every 4 rows vs. every 6).
- Vary the width (try a 6-stitch cable for bold impact).
- Mix left and right leans to create braids, diamonds, or honeycomb patterns.
Advanced idea: Combine cables with lace or mesh panels. The contrast between dense texture and openwork creates stunning visual balance—perfect for shawls or yoke sweaters.
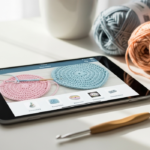
Use graph paper or apps like Stitch Fiddle or Crochet Charts to sketch your ideas. Each square = one post-stitch column. Map out crosses with arrows.
Inspiration tip: Study Aran knitting charts—they translate beautifully to crochet! Just remember: in crochet, you’re simulating the cross, not physically moving stitches.
Most importantly, keep a swatch journal. Note your yarn, hook size, row count, and results. Over time, you’ll build a personal library of cable “recipes” you can reuse and refine.
Cable crochet isn’t just technique—it’s artistry. And you’re now equipped to create it.
Final Thoughts: Patience, Practice, and Pride
Crocheting cables is like learning a secret language—one that speaks through texture, shadow, and twist. It asks for precision, yes, but rewards you with heirloom-quality results that stop strangers in their tracks.
Don’t rush. Make a small swatch first. Celebrate when your first cable “pops” correctly. And remember: every expert crocheter once fumbled their FPdc.
Your cables will become your signature—proof that you dared to go beyond the basic stitch.
Conclusion
Cable crochet may seem intimidating, but as we’ve explored, it’s built on accessible techniques: mastering front-post stitches, understanding the illusion of crossing, executing clean crosses, troubleshooting common issues, and eventually designing your own patterns. With the right yarn, hook, and mindset, you can create rich, textured projects that rival—and often surpass—knitted cables.
The key is patience and practice. Start with a simple 4-stitch cable on a practice swatch. Use stitch markers, block your work, and don’t skip the swatch phase. Each repetition builds muscle memory and confidence.
Now, imagine your next project—a cabled infinity scarf, a textured cardigan, or a cozy throw—showcasing your new skill. That sense of pride is worth every dropped stitch along the way.
We’d love to see your progress!
Have you tried crocheting cables before? What’s your dream cable project? Share your questions, tips, or photos in the comments below. If this guide inspired you, pass it on to a fellow crocheter ready to tackle their first twist. Happy stitching—and may your cables be crisp, your tension even, and your creativity endless!

Sophia Williams is a crochet enthusiast who found in yarn and hooks a creative way to express calm, patience, and love for handmade art. Focused on the crochet niche, she shares her experience, techniques, and inspiration with those who want to learn, relax, and create meaningful pieces stitch by stitch.