Introduction
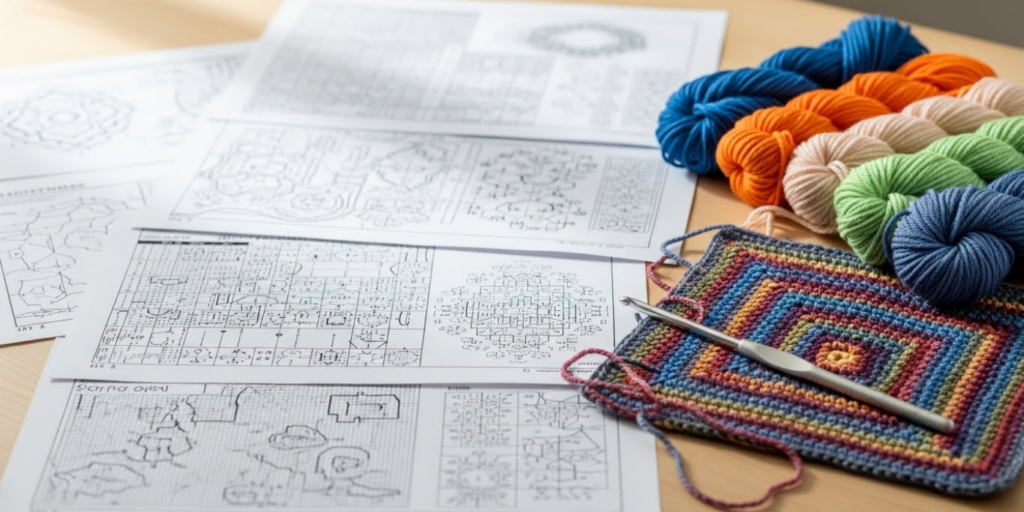
You’ve mastered the basics—single crochet, double crochet, even the occasional cluster stitch. But then you stumble upon a stunning lace shawl or an intricate doily, only to find the pattern isn’t written in words—it’s a mysterious grid of symbols, arrows, and concentric circles. If your heart sinks a little, you’re not alone. Many crocheters shy away from advanced charts, assuming they’re only for experts or require a decoder ring.
But here’s the truth: crochet charts and diagrams are visual language—and once you learn the alphabet, they become clearer than written instructions. In fact, charts eliminate language barriers, reduce wordiness, and help you “see” the fabric before you even make it.
In this guide, we’ll demystify advanced crochet charts step by step. You’ll learn how to interpret symbols, follow repeats, navigate circular diagrams, and troubleshoot common pitfalls. Whether you’re tackling a lace stole, a colorwork blanket, or a complex amigurumi, these skills will boost your confidence and open doors to global patterns. Ready to turn confusion into clarity? Let’s decode the visual magic together.
Why Charts? The Power of Visual Crochet Patterns
Before diving into symbols, it helps to understand why designers use charts in the first place.
Written patterns can be ambiguous—phrases like “repeat from * to **” or “work in the next space” may confuse beginners. Charts, on the other hand, show you exactly where each stitch goes, like a map of your project. This is especially useful for:
- Lace and filet crochet, where stitch placement creates the design
- Colorwork or tapestry crochet, where visual tracking prevents mistakes
- Garments with shaping, where symmetry matters
- Patterns from non-English sources, since symbols are standardized by the Craft Yarn Council
Think of a chart like sheet music for knitting or crochet—it’s universal. Once you know the symbols, you can follow a Japanese lace pattern as easily as an American one.
Bonus: Charts help you spot errors faster. If your piece doesn’t mirror the diagram, you’ll catch a missed stitch long before finishing.
Understanding the Symbol System: Your Crochet Rosetta Stone
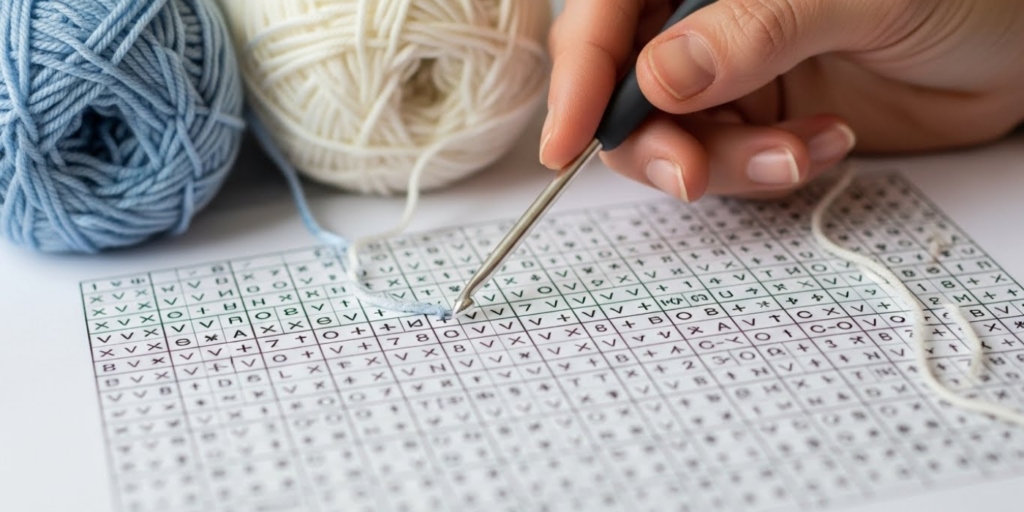
All modern crochet charts use standardized symbols established by organizations like the Craft Yarn Council and ISO. These symbols represent stitches visually:
- ○ or ⚪ = chain stitch (ch)
- │ or ■ = single crochet (sc)
- ┬ or ┼ = double crochet (dc)
- Y-shaped symbol = treble crochet (tr)
- Small oval or loop = slip stitch (sl st)
Key tips for reading symbols:
- Stitch height matters: Taller stitches (like dc or tr) have longer vertical lines.
- Filled vs. open shapes: Solid symbols often mean worked into the stitch; open may mean worked around or into a space.
- Arrows and numbers: Indicate direction of work, repeats, or stitch counts.
Pro tip: Print a free symbol chart cheat sheet (available from most yarn brand websites) and keep it handy. Laminate it or stick it in your project bag!
Remember: Symbols don’t change between patterns—but always check the legend. Some designers add custom symbols for special stitches (like popcorn or puff stitches), so the key is your best friend.
Reading Row-by-Row (Flat) Charts: Left, Right, and Turning
Flat charts—used for scarves, blankets, or garment pieces—work back and forth in rows. Here’s how to navigate them:
- Start at the bottom: Row 1 is always the lowest row.
- Odd-numbered rows (right side): Read right to left.
- Even-numbered rounds (wrong side): Read left to right.
- Turning chains: The first symbol of each row often shows how many chains to make to “step up” (e.g., 3 chains for dc).
- Repeats: Brackets [ ] or shaded boxes indicate sections to repeat across the row.
Example: Imagine a lace pattern with a 10-stitch repeat. The chart shows one repeat clearly—your job is to replicate it 8 times across a 80-stitch row.
Common mistake: Forgetting to reverse direction on even rows. This leads to stitches leaning the wrong way or misaligned lace motifs.
Try this: Practice with a simple chevron blanket chart. The zigzag makes it easy to see if you’re reading correctly—each peak and valley should line up perfectly.
Decoding Circular and Round Charts: Spirals, Motifs, and Hats
Round charts are used for amigurumi, doilies, granny squares, and hats. These are read from the center outward, like tree rings.
How it works:
- Round 1 is the tiny circle in the middle.
- Arrows show the direction of work (usually counter-clockwise for right-handed crocheters).
- Joining vs. continuous rounds:
- A closed circle with a slip stitch symbol at the end means you join each round.
- A spiral (no join) means you keep going without closing—common in amigurumi.
- Increases are spaced evenly to keep the piece flat. If your circle starts cupping or ruffling, you’ve missed an increase!
Pro tip: Use stitch markers to mark the beginning of each round. In spiral charts, move the marker up as you go.
Real-world example: A classic doily might start with 8 dc in a ring (Round 1), then 16 dc in Round 2 (2 dc in each stitch), then 24 dc (alternating 1 and 2 dc)—all shown clearly with symbols radiating outward.
Watch for: Special stitches like shells or clusters—they’re often drawn as grouped symbols. The legend will explain how to work them.
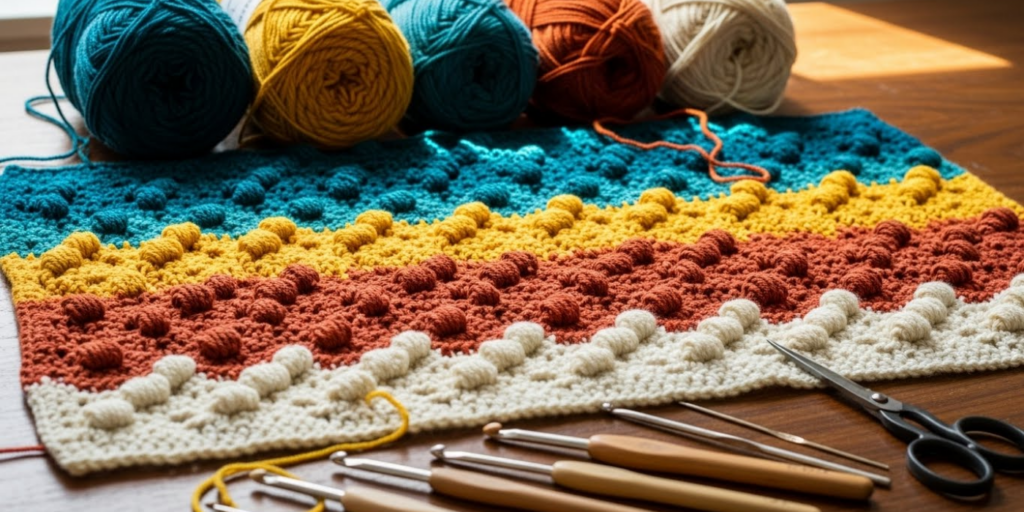
Tackling Complex Elements: Color Changes, Texture, and Repeats
Advanced charts often combine multiple techniques. Here’s how to handle them:
1. Colorwork (tapestry or intarsia)
- Each color has its own symbol or shaded area.
- Unused yarn is carried along the back—you’ll see dotted lines indicating float paths.
- Tip: Work with bobbins or small yarn balls to avoid tangles.
2. Textured stitches (bobbles, popcorns, cables)
- These appear as custom symbols (often a filled circle or asterisk).
- The legend will specify: “Popcorn: work 5 dc in same st, drop loop, insert hook in first dc, pull dropped loop through.”
- Always practice the stitch on a swatch first.
3. Large repeats and mirroring
- Symmetrical shawls often show only half the chart, with a center line marked. You work one side, then mirror it.
- Look for “repeat as established” notes in the key.
Challenge yourself: Try a simple hexagon motif chart. It uses increases, dc groups, and slip stitches—all in a compact, repeatable form. Once you master it, you can make coasters, blankets, or bags.
Practical Strategies to Build Your Chart-Reading Confidence
Don’t try to swallow the whole chart at once. Instead, use these real-world tactics:
- Highlight your current row with a sticky note or ruler to avoid losing your place.
- Sketch a small section on graph paper to understand the flow before starting.
- Work a swatch in contrasting yarn to test a tricky repeat.
- Use apps like Stitch & Share or Crochet Diagrams that animate chart progress.
- Follow along with video tutorials that reference the same chart—seeing it stitched helps immensely.
Mindset shift: Treat the chart like a puzzle, not a test. Every crocheter gets lost sometimes—even designers! The goal isn’t perfection; it’s progressive understanding.
Common Pitfalls and How to Avoid Them
Even experienced crocheters misread charts occasionally. Watch out for:
- Assuming all symbols are universal: Always, always check the legend.
- Ignoring scale: A symbol might look like a dc but represent a cluster—context matters.
- Skipping row numbers: Missing that you’re on Row 12 instead of Row 13 can throw off an entire lace repeat.
- Not counting stitches: Charts assume you’ll make the right number. Count after each row to stay on track.
If you get lost: Frog (rip out) back to the last correct round and try again. It’s frustrating but far better than finishing a lopsided shawl.
Why Mastering Charts Opens Creative Doors
Once you’re comfortable with charts, your crochet world expands dramatically. You can:
- Access thousands of European and Japanese patterns (many only published as diagrams)
- Design your own patterns using charting software
- Teach others using clear visual aids
- Troubleshoot projects faster by “seeing” the structure
Take Maria, a crocheter from Texas, who used to stick to beginner blankets. After learning charts, she tackled a vintage lace table runner from a 1950s Danish pattern—written only in symbols. “It felt like time travel,” she said. “And now I’m hooked on vintage diagrams!”
That’s the magic: charts connect you to a global, timeless craft community.
Conclusion
Reading advanced crochet charts isn’t about memorizing every symbol—it’s about learning to see the rhythm of your stitches. With practice, those grids of lines and circles transform from confusing puzzles into clear roadmaps of beauty and structure. You’ll spot repeats, anticipate shaping, and understand how each stitch contributes to the whole.
Don’t rush. Start with simple lace or a granny square chart. Use your legend, mark your rows, and celebrate small wins. Every crocheter who’s ever made a doily, a sweater, or a stuffed owl began exactly where you are now—staring at a chart, wondering, “Can I really do this?”
The answer is yes. And every symbol you decode brings you closer to creating something uniquely yours.
Ready to try? Pick a free chart-based pattern this week—maybe a hexagon coaster or a leaf motif—and give it a go. Then come back and tell us: What symbol tripped you up first—and how did you conquer it? Share your journey in the comments below, or tag a friend who’s ready to level up their crochet game. Happy charting!

Sophia Williams is a crochet enthusiast who found in yarn and hooks a creative way to express calm, patience, and love for handmade art. Focused on the crochet niche, she shares her experience, techniques, and inspiration with those who want to learn, relax, and create meaningful pieces stitch by stitch.