Introduction
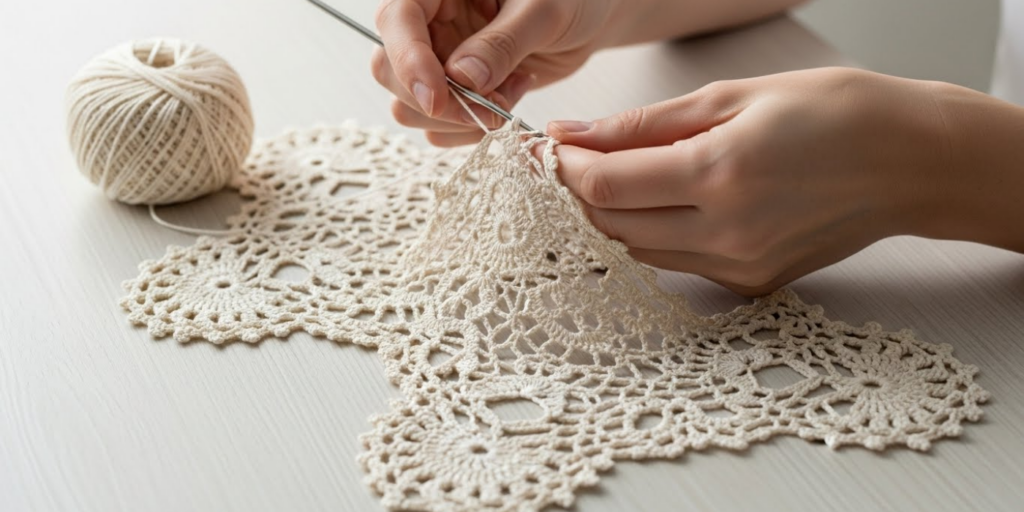
There’s something magical about lace crochet—the way light filters through openwork stitches, how a simple thread transforms into delicate doilies, elegant shawls, or heirloom table runners. But if you’ve ever looked at a lace pattern and felt overwhelmed by the symbols, skipped stitches, and tiny hooks, you’re not alone. Many crocheters assume lace is “too advanced” or reserved for experts with decades of experience.
Here’s the truth: intricate lace isn’t about innate talent—it’s about technique, patience, and the right approach. With a solid foundation and a few strategic tips, even intermediate crocheters can create stunning lace pieces that look like they came from a vintage boutique.
In this guide, we’ll walk you through everything you need to know to crochet intricate lace patterns with confidence. You’ll learn how to read lace charts and written instructions, choose the perfect materials, master essential stitches (like chains, double crochets, and picots), and troubleshoot common pitfalls. We’ll even include a simple step-by-step lace motif you can practice today. Whether you dream of making a wedding veil, a summer shawl, or delicate edging for baby clothes, this article will give you the tools to begin—and succeed.
1. Understanding What Makes Lace “Lace”
Before diving into patterns, it helps to understand the core principle of lace crochet: balance between openness and structure.
Lace isn’t just “holes.” It’s a deliberate dance of stitches and spaces—where chains create airy gaps, and taller stitches (like double or treble crochet) form the framework that holds the design together. The beauty comes from repetition, symmetry, and negative space.
Most traditional lace patterns rely on a few key elements:
- Chain spaces (ch-sp): The “windows” that let light through.
- Clusters or shells: Groups of stitches that anchor the design.
- Yarn overs and skipped stitches: Techniques that shape the flow.
Why this matters: Once you recognize these building blocks, complex-looking charts become much less intimidating. Instead of seeing chaos, you’ll see rhythm—like reading music once you know the notes.
Tip for beginners: Start with filet crochet or mesh lace—these use simple grids of filled and empty blocks, making them ideal “gateway” lace styles. From there, you can move to Irish crochet, pineapple motifs, or edging patterns.
Remember: lace rewards slowness. Rushing leads to missed chains or misaligned repeats. Embrace the meditative pace—it’s part of the charm.
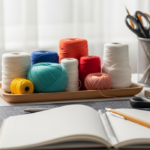
2. Choosing the Right Yarn and Hook
Materials make or break lace. Use bulky yarn and a large hook, and your “lace” will look like a fishing net. Go too fine too soon, and you’ll strain your eyes and drop stitches.
Ideal yarn for lace:
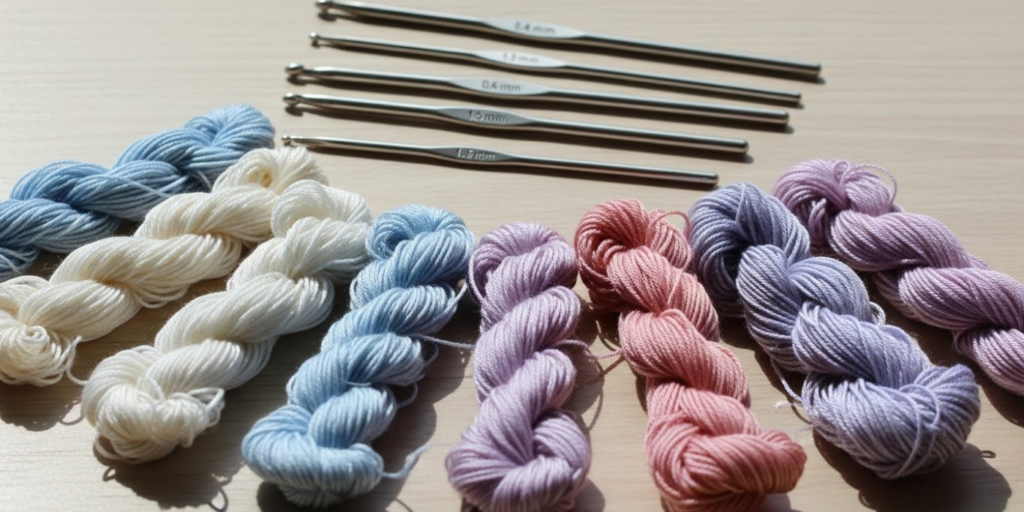
- Fingering weight (#1) or thread (size 10–30): Creates drape and delicacy.
- Cotton or mercerized cotton: Holds shape well, shows stitch definition clearly, and blocks beautifully.
- Solid, light colors: Makes it easier to see your stitches (avoid dark or variegated yarns when learning).
Hook selection:
- Use a steel hook for thread (sizes 7–12) or a small aluminum hook for fingering weight (sizes B-1 to E-4).
- Choose a hook 1–2 sizes smaller than the yarn label suggests—this keeps stitches crisp and prevents sagging.
Don’t skip blocking!
Lace truly comes alive after wet or steam blocking. Pin your finished piece to shape, let it dry, and watch the pattern open up like a blooming flower. It’s not optional—it’s essential.
Pro tip: Practice your first lace swatch with size 10 cotton thread and a size 7 steel hook—this combo is forgiving, affordable, and classic for doilies and edgings.
3. Reading Lace Patterns: Charts vs. Written Instructions
Lace patterns often come in two formats: written instructions and symbol charts. Many crocheters find charts easier once they learn the basics.
Written instructions look like this:
*Row 1: Ch 4, dc in 4th ch from hook, ch 2, skip 2 ch, dc in next ch; repeat from * to end.
Symbol charts use icons to represent each stitch—chains as ovals, dc as “T” shapes, etc.—arranged visually to mirror the actual fabric.
Which should you use?
- Written: Better if you’re new to lace or prefer step-by-step language.
- Charts: Better for spotting repeats, symmetry, and errors at a glance.
How to read them effectively:
- Highlight repeats in written patterns (e.g., everything between asterisks).
- Use a ruler or post-it to track your row on a chart.
- Work row-by-row, not stitch-by-stitch—lace is about groups, not individual moves.
Common symbols to know:
- ⚪ = chain
- | or T = double crochet
- V = shell or cluster
- Dotted lines = skipped stitches or spaces
Start with a simple 6–8 row repeat. Master it. Then scale up.
4. Mastering Essential Lace Stitches and Techniques
You don’t need 50 stitches to make lace—just a few, used well. Here are the core techniques you’ll use again and again:
1. Chain spaces (ch-sp)
The backbone of openness. Always count your chains carefully—missing one throws off alignment.
2. Double crochet (dc) and treble crochet (tr)
Taller stitches create height and framework. Keep your tension consistent so they don’t sag.
3. Clusters and shells
These add texture and anchor points. A 5-dc shell, for example, fans out beautifully over a chain space.
4. Picots
Tiny decorative loops (ch 3, sl st into first ch) that finish edges elegantly.
5. Skipping stitches
This creates the “holes.” Always skip exactly as written—no more, no less.
Practice exercise:
Make a basic lace fan repeat:
- Ch 18.
- Row 1: Dc in 4th ch from hook, *ch 2, skip 2 ch, dc in next ch; repeat from * to last 3 ch, ch 2, skip 2, dc in last ch.
- Row 2: Ch 3 (counts as first dc), turn. Dc in first dc, *ch 2, dc in next dc; repeat to end.
- Repeat Row 2 for pattern.
This builds muscle memory for spacing and rhythm—key for larger projects.
5. Avoiding Common Lace Mistakes (and How to Fix Them)
Even experienced crocheters stumble with lace. Here’s how to sidestep the usual traps:
Mistake 1: Losing your place in a long repeat
Fix: Use stitch markers every 3–5 repeats. Or work over a printed chart with a highlighter.
Mistake 2: Uneven edges
Fix: Always work your first and last stitches into the correct spots. Many patterns end with a dc in the turning chain—don’t skip it!
Mistake 3: Tight chains that won’t stretch
Fix: Make chains looser than your stitches. Your hook should glide through them easily during the next row.
Mistake 4: Forgetting to count chain spaces as “stitches”
Fix: In lace, a ch-2 space often replaces a stitch. When the pattern says “dc in next st,” it might mean “dc in next ch-sp.” Read carefully!
Mistake 5: Not blocking
Fix: Block every swatch. It’s the only way to see your true gauge and pattern clarity.
Bonus tip: If you make a mistake more than 2 rows back, don’t frog the whole thing. Use a latch hook to carefully undo just the error row—saves hours of rework.
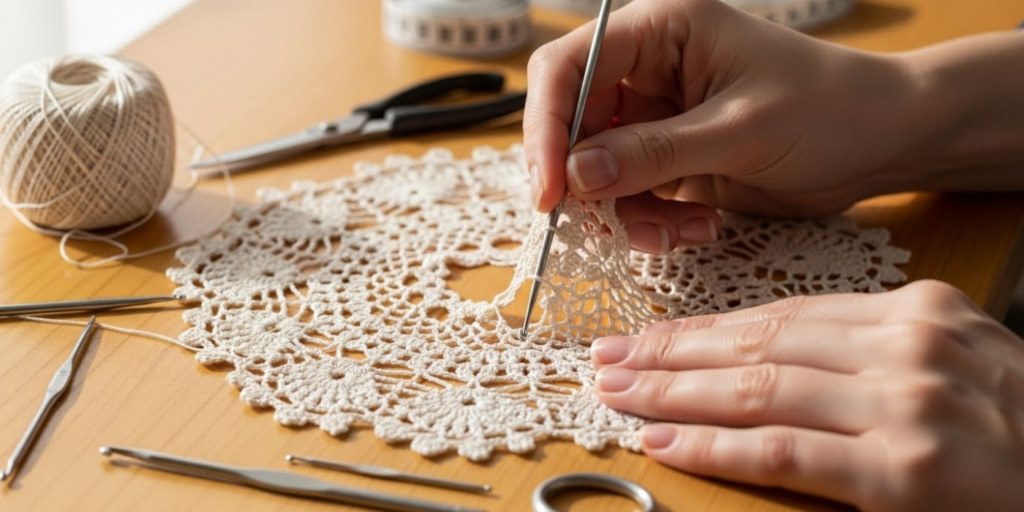
6. Step-by-Step: Practice a Simple Lace Motif
Let’s put it all together with a beginner-friendly pineapple lace square—a classic motif used in shawls and table toppers.
Materials:
- Size 10 cotton thread
- Size 7 steel hook
- Stitch markers
Instructions:
- Round 1: Ch 8, join with sl st to form ring. Ch 3 (counts as dc), work 15 dc into ring. Join with sl st to top of ch-3. (16 dc)
- Round 2: Ch 4 (counts as dc + ch-1), *dc in next dc, ch 1; repeat from * around. Join with sl st to 3rd ch of beginning ch-4.
- Round 3: Sl st into ch-1 sp. Ch 3, 2 dc in same sp, *ch 3, 3 dc in next ch-1 sp; repeat from * around. Join.
- Round 4: Sl st to center of first 3-dc cluster. Ch 3, dc in same spot, ch 5, sl st in 3rd ch (picot), ch 2, 3 dc in next cluster, ch 5, picot, ch 2; repeat. Join.
Why this works: It combines clusters, chains, picots, and rings—core lace elements—in a compact, repeatable shape. Once you master one “petal,” you can join motifs or expand the design.
Work slowly. Count after every round. And block your finished square—you’ll be amazed at the transformation.
The Art of Patience: Why Lace Rewards Mindful Crochet
Lace isn’t just a craft—it’s a practice in presence. Unlike fast-paced amigurumi or blankets, lace asks you to slow down, observe, and connect with each loop and space. In a world of instant everything, that’s a rare gift.
Every chain you count, every picot you shape, becomes a quiet act of creation. And the result? A piece that carries your focus, care, and time—something truly irreplaceable.
Conclusion
Crocheting intricate lace patterns isn’t reserved for experts—it’s accessible to anyone willing to learn the fundamentals and practice with intention. By choosing the right materials, understanding pattern structure, mastering core stitches, and avoiding common mistakes, you can create delicate, beautiful lace that delights both you and those who receive your handmade gifts.
Start small. Practice a motif. Block it proudly. Then build from there. With each row, you’re not just making lace—you’re weaving patience, precision, and artistry into tangible form.
Ready to try? Grab some thread and a steel hook this weekend and work the pineapple motif above. Then come back and tell us how it went! What’s your dream lace project—shawl, doily, or wedding accessory? Share your goals or questions in the comments below, and if this guide inspired you, pass it on to a fellow crocheter who’s ready to level up. Happy lace-making!

Sophia Williams is a crochet enthusiast who found in yarn and hooks a creative way to express calm, patience, and love for handmade art. Focused on the crochet niche, she shares her experience, techniques, and inspiration with those who want to learn, relax, and create meaningful pieces stitch by stitch.