Introduction
If you’ve ever picked up a crochet hook for the first time, you might’ve felt like you were trying to solve a puzzle—while juggling spaghetti. Your hand cramps after five minutes, the yarn slips through your fingers, and your stitches look more like accidental knots than anything Pinterest-worthy. Sound familiar? You’re not alone.
One of the biggest hurdles for beginner crocheters isn’t understanding stitches—it’s simply how to hold the hook and yarn without tension, pain, or frustration. Yet, this foundational skill is often glossed over in tutorials. The truth is, how you hold your tools directly affects your stitch tension, speed, comfort, and even your ability to keep crocheting long-term.
In this guide, we’ll walk you through everything you need to know about holding your crochet hook and managing your yarn—comfortably, efficiently, and without strain. You’ll learn the two main grip styles, how to tension yarn like a pro, simple tweaks to avoid hand fatigue, and why “perfect form” matters less than what works for your hands. Whether you’re making your first dishcloth or dreaming of a cozy blanket, mastering this skill will transform your experience from awkward to effortless. Let’s get you hooked—comfortably!
The Two Main Ways to Hold a Crochet Hook: Pencil vs. Knife Grip
When it comes to holding your hook, there’s no single “right” way—but there are two dominant styles: the pencil grip and the knife grip. Most experienced crocheters use one or the other consistently, and beginners often find one feels more natural than the other.
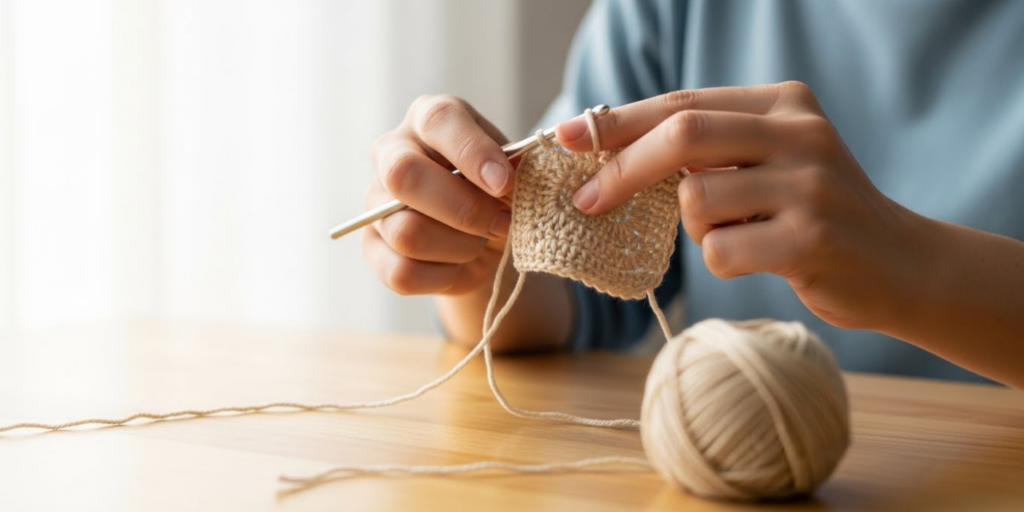
Pencil grip (also called “pen hold”) involves holding the hook like you would a writing pen—between your thumb and index finger, with the shaft resting on your middle finger. This grip offers precision and fine control, making it popular among those who work on detailed projects like amigurumi or lace. If you’re used to writing or drawing, this may feel instantly familiar.
Knife grip (or “overhand hold”) means holding the hook like you’re holding a dinner knife—palm over the top, with your thumb and index finger pinching the flat part near the head. This style provides more power and relaxed motion, which many find easier for long sessions or bulkier yarns. It often leads to looser, more rhythmic stitching.
Try both! Sit comfortably, relax your shoulders, and mimic each grip for 30 seconds. Which one causes less tension in your wrist? Which lets you move the hook smoothly without gripping too tightly?
Important tip: Don’t force yourself into a grip just because a YouTube video says it’s “best.” Your hands are unique. The goal isn’t perfection—it’s comfort and sustainability. Many crocheters even switch between grips depending on the project!
How to Tension Yarn with Your Non-Dominant Hand
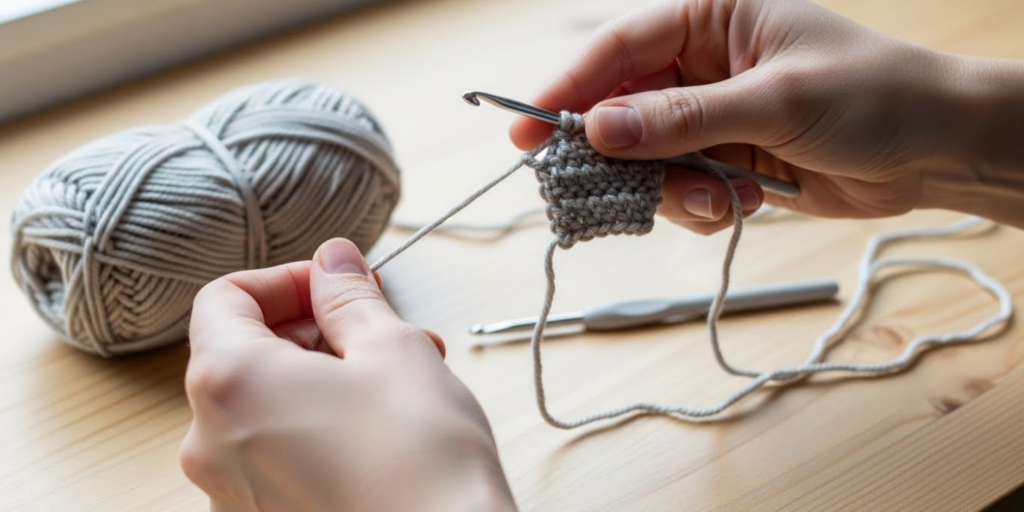
Now that your hook hand is sorted, let’s talk about the other half of the equation: yarn control. The secret to even, consistent stitches isn’t magic—it’s yarn tension, and that comes from how you guide the yarn with your non-hook hand (usually your left hand if you’re right-handed).
Beginners often either grip the yarn too tightly (leading to stiff, tiny stitches) or let it run loose (creating sloppy, uneven loops). The sweet spot? Gentle, steady resistance.
Here’s a simple method to start:
- Drape the yarn over your index finger (closest to the hook).
- Wrap it under your middle and ring fingers, then over your pinky.
- Hold the tail end lightly with your thumb against your palm.
- Use your index finger to raise or lower tension: lift for tighter stitches, relax for looser ones.
Think of your fingers as a brake and accelerator—subtle movements create big differences in stitch size.
Some crocheters use fewer fingers (just the index and pinky), while others loop the yarn around their pinky for extra control. Again, experiment. Try making a small swatch while adjusting how the yarn flows through your hand. Notice how each change affects your stitches.
Pro tip: If your fingers cramp, you’re holding too tight. The yarn should glide—not drag. Imagine it’s a silk ribbon, not a rope you’re trying to tame.
Avoiding Hand and Wrist Pain: Ergonomics for New Crocheters
Crocheting shouldn’t hurt. Yet many new crafters develop hand fatigue, thumb strain, or even wrist pain within minutes. Why? Because they’re gripping too hard or holding unnatural postures.
Here’s how to crochet comfortably for hours—not just minutes:
- Relax your grip. Your hook should rest in your hand, not be clenched like a lifeline. Imagine you’re holding a baby bird—firm enough so it doesn’t fly away, but gentle enough not to hurt it.
- Keep your wrist straight. Bending your wrist up or down creates strain. Try resting your forearm on a pillow or table to maintain a neutral position.
- Take breaks every 20–30 minutes. Shake out your hands, roll your wrists, and stretch your fingers. Even 30 seconds helps.
- Use ergonomic tools. Hooks with soft, cushioned handles (like Clover Amour or Tulip Etimo) reduce pressure on your fingers. A larger hook size (like H/5mm or above) is also easier to hold than tiny steel hooks.
Also, check your posture. Slouching or hunching over your work tenses your shoulders, which trickles down to your hands. Sit upright, with good lighting, and bring your work up to eye level—not the other way around.
Remember: crocheting is a marathon, not a sprint. Building comfort now prevents burnout (and pain) later.
Common Beginner Mistakes—and How to Fix Them
Let’s address a few “oops” moments you might be experiencing—and how to overcome them:
Mistake #1: Dropping the yarn constantly
This usually means your tension is too loose or your fingers aren’t guiding the yarn consistently. Try wrapping the yarn once around your pinky—it adds just enough friction to keep it from slipping.
Mistake #2: Stitches are either too tight or too loose
This is almost always a yarn tension issue. Practice making a “tension swatch”: crochet 10 rows of single crochet, focusing only on keeping your yarn flow steady. Don’t worry about the look—focus on the feel.
Mistake #3: Your hook hand gets sore quickly
You’re probably using your whole hand to move the hook instead of just your fingers. In both pencil and knife grip, the motion should come from your thumb and index finger, not your wrist or forearm.
Mistake #4: You can’t see what you’re doing
Use light-colored, smooth yarn (like worsted-weight acrylic) for practice. Dark, fuzzy, or slippery yarns hide stitches and make learning harder.
Above all, be patient with yourself. Even expert crocheters started with lopsided chains and tangled yarn. Every awkward minute builds muscle memory.
Customizing Your Technique: It’s Okay to Be “Unconventional”
Here’s a liberating truth: there’s no crochet police. If wrapping the yarn around your elbow helps you tension better, go for it. If you hold your hook like a paintbrush, that’s valid too.
Some left-handed crocheters mirror right-handed techniques; others learn “righty” style and thrive. Some loop yarn around their neck (not recommended for safety, but surprisingly common!). The key is function over form.
One beginner I knew strung her yarn through a binder clip clipped to her jeans—creating instant, hands-free tension. It looked odd, but her stitches were perfect. She’s now teaching classes.
Your body, your tools, your rules. As long as you’re making stitches, not hurting yourself, and enjoying the process, you’re doing it “right.”
That said, if you experience persistent pain, numbness, or tingling, stop and consult a doctor. Conditions like carpal tunnel can be aggravated by repetitive motion—so listen to your body.
Building Muscle Memory Through Simple Practice Routines

Want to make comfortable hook and yarn control second nature? Try these mini-routines:
- The 5-Minute Drill: Set a timer. Hold your hook and yarn in your chosen grip. Don’t crochet—just practice moving the hook as if you were making stitches. Focus on fluid motion and relaxed fingers.
- Chain-Only Practice: Make chains for 10 minutes a day. Chains force you to manage yarn tension and hook control without the complexity of other stitches.
- Mirror Work: Crochet in front of a mirror. Watch your hands. Are your shoulders up? Is your wrist bent? Adjust in real time.
- Slow-Mo Crocheting: Work on single crochet stitches at half-speed. Notice how your fingers move, where tension builds, and how the yarn flows.
These aren’t about finishing a project—they’re about training your hands to move with ease.
Over time, your muscles will remember what to do, and you’ll shift focus from “how” to “what”—freeing your creativity to soar.
Conclusion
Learning to hold your crochet hook and yarn comfortably isn’t just about technique—it’s about setting yourself up for joy, not frustration. When your hands are relaxed and your tension is steady, crocheting becomes meditative, satisfying, and sustainable. You’ll finish projects faster, with better results, and most importantly, you’ll want to keep coming back to your hook and yarn.
We’ve covered the two main hook grips, how to tension yarn without strain, ergonomic tips to prevent pain, common fixes, and the freedom to adapt your style to your unique body. Now, it’s your turn to explore, experiment, and find what feels right for you.
Don’t worry about copying someone else’s “perfect” hold. Focus on comfort, consistency, and kindness to your hands. Every expert crocheter once fumbled with their first chain—they just kept going.
So grab your hook, unwind some yarn, and give yourself grace. Try one new adjustment today—maybe a softer grip or a different finger wrap—and see how it feels. And if you’ve discovered a quirky trick that works for you, share it in the comments! We’re all learning together, one comfortable stitch at a time. Happy crocheting!

Sophia Williams is a crochet enthusiast who found in yarn and hooks a creative way to express calm, patience, and love for handmade art. Focused on the crochet niche, she shares her experience, techniques, and inspiration with those who want to learn, relax, and create meaningful pieces stitch by stitch.